How to Update 1099-NEC Vendors
Changes
1099-NEC form is back for reporting nonemployee compensation. Report on nonemployee compensation for the 2020 tax year in Sage Intacct with the 1099-NEC form. This form was used by the IRS in previous years, but until recently you reported nonemployee compensation in Box 7 on the 1099-MISC form.
Now, they're bringing it back for the 2020 tax year. The 1099-MISC form has also been updated to reflect the change.
JMT Consulting recommends being prepared for this change and making sure your vendors are set up correctly for 1099 reporting. You can start tagging 1099-NEC transactions now, and start updating transactions prior to the start of the 1099 season.
Instructions
We have included instructions below to help you with 2 important parts of this update.
- Update a vendor’s 1099 record manually or via import.
- Move the balance in the 1099-MISC box 7 to 1099-NEC box 1.
Updating 1099 Vendors
Manually Updating
To update a Vendor’s 1099 form and box manually:
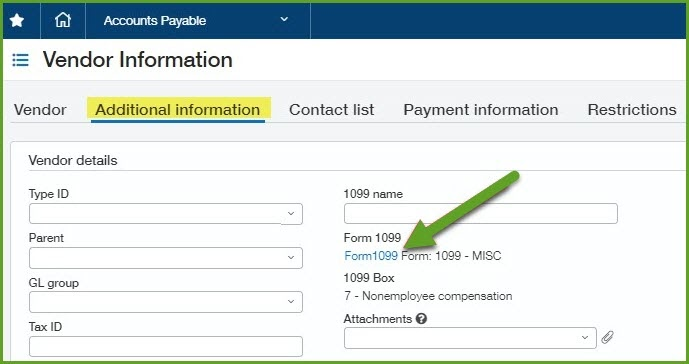
Go to: Accounts Payable > Vendors > Search for the vendor by ID or Name > click Edit > Additional Information tab > Form 1099 link
Select Form NEC and box 1, click Save and then Save the vendor record. 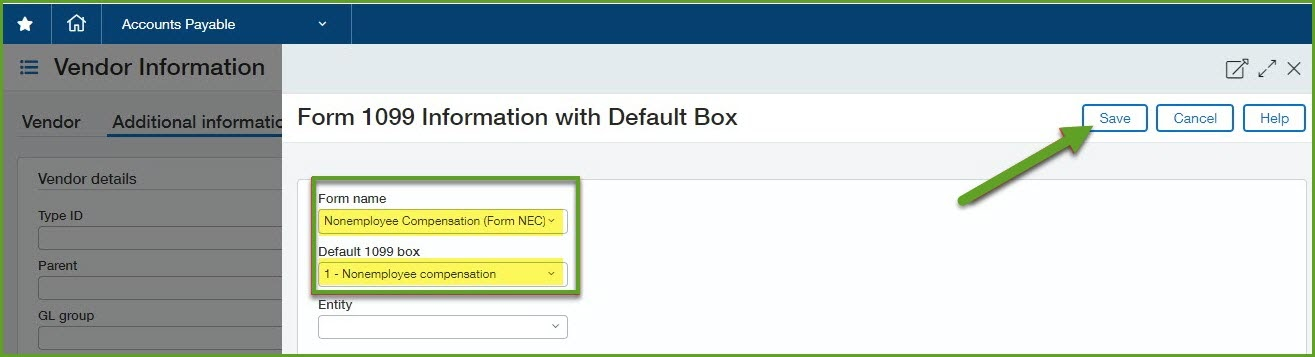
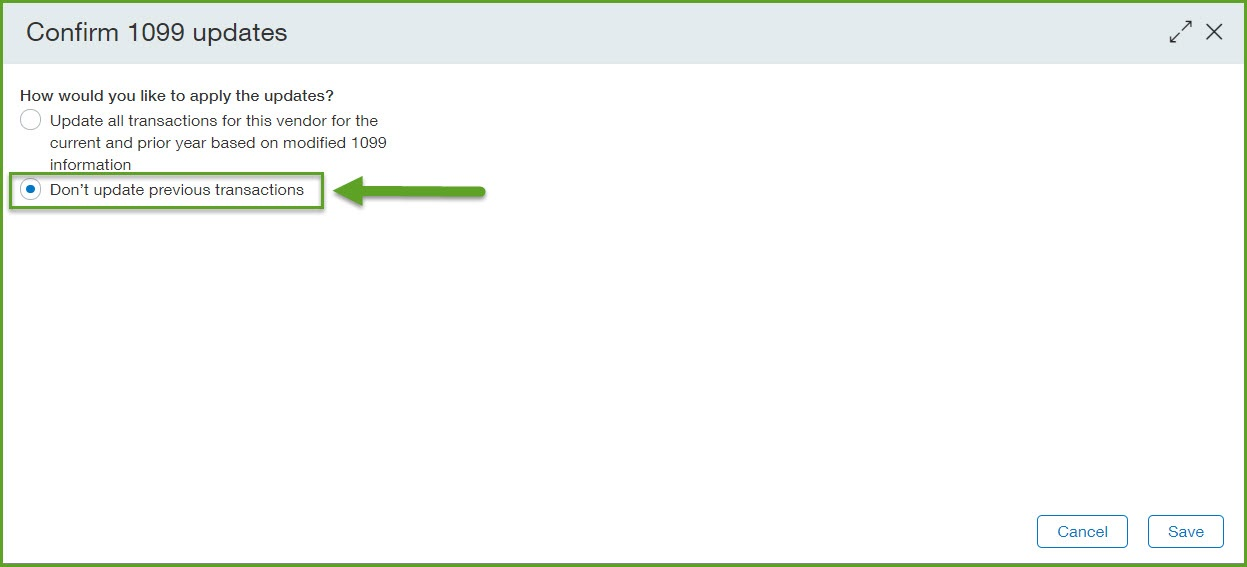
Select Don’t update previous transactions and Save.
Updating with Import
There are several steps to this process.
Step 1: Create a view for the 1099 Misc vendors.
Go to: AP > Vendors > Click Manage Views > Create New View

Select the columns for the view.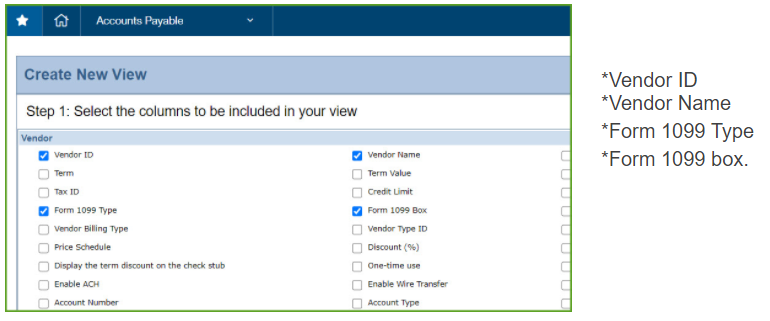
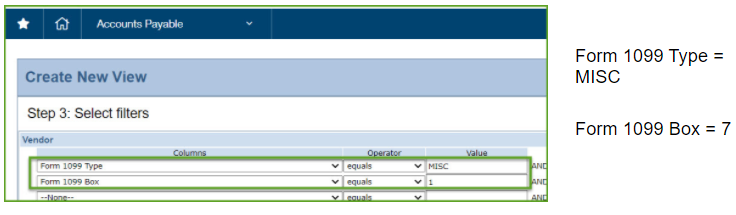
Select the filters for the view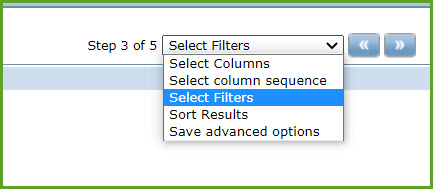
Select filters:
Save the view as 1099- MISC Box 7 Vendors.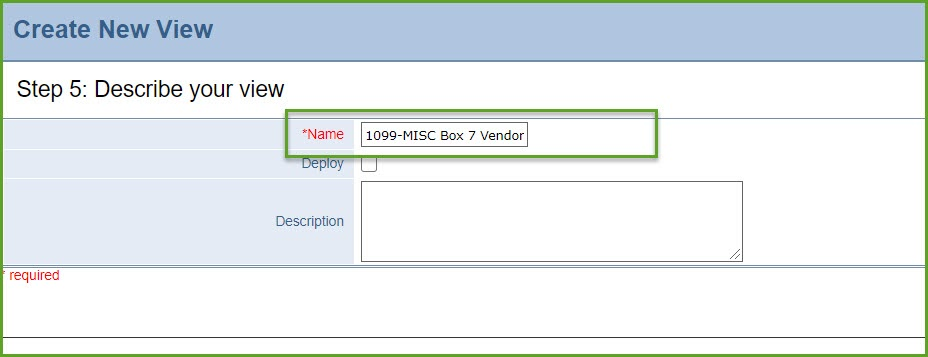
Step 2: Export the view to update the template
Switch your Vendor List screen view to the newly created view.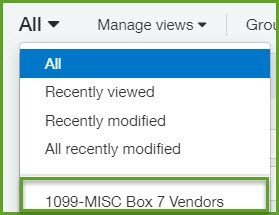
Then, click the Export button and select CSV for Import.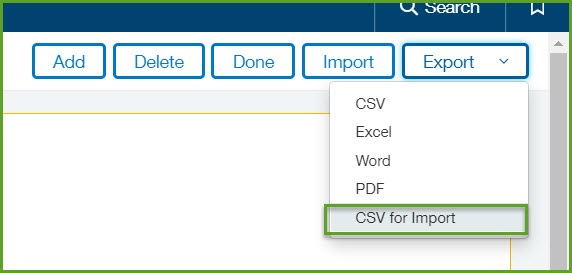
Update the file.
- Edit it to only have 3 columns
- Vendor_ID
- Form1099TYPE
- FORM1099BOX
- Change the values
- FORM1099TYPE, change value to NEC
- FORM1099BOX, change value to 1
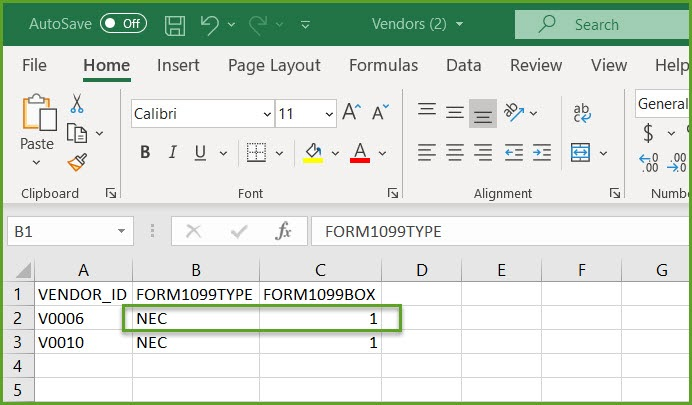
Save as CSV file.
Step 3: Import the template
Go to: Vendor list screen and click the Import button.

Moving the Balance
Step 1: Get the current 1099 Report in AP
Go to: AP > 1096/1099 > 1099 reports

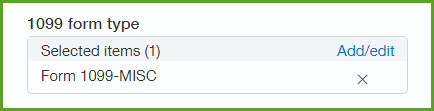
Select Form 1099-MISC in the 1099 form type field.
Export the report.
You will use the information to populate the import template for Vendor 1099 Opening Balances.
Go to: Company > Import Data > download the Vendor 1099 Opening Balances template.

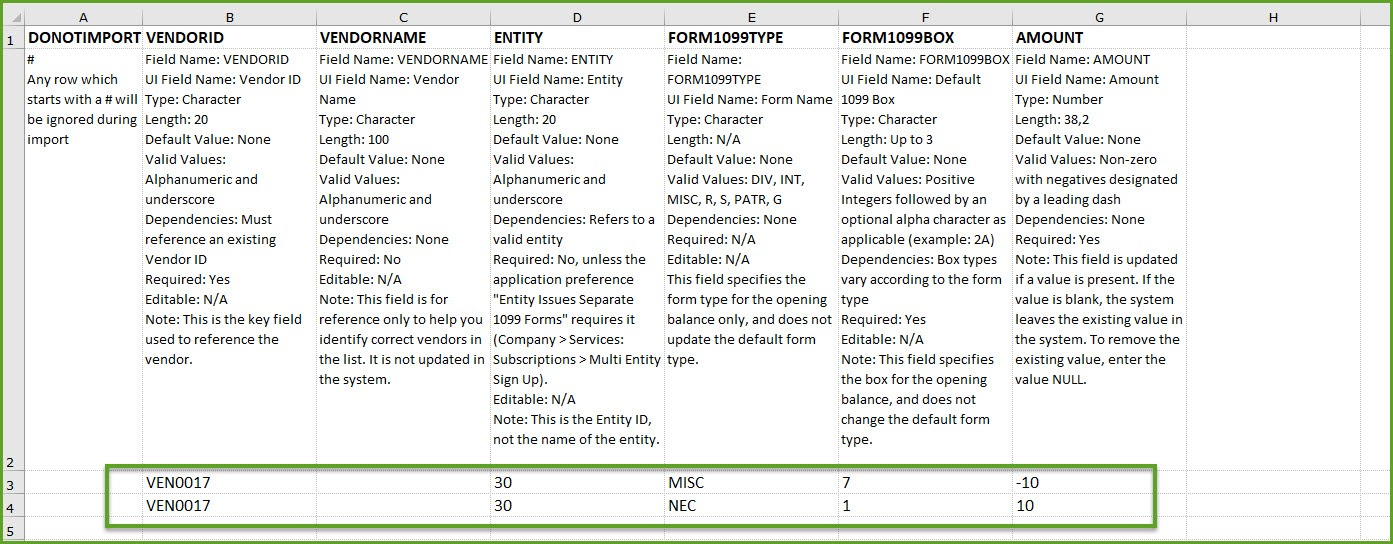
Populate this template with a two lines per vendor:
- A negative amount for Form 1099-MISC box 7.
- A positive amount for Form 1099-NEC box 1.
You can verify the changes by re-running the 1099 Report.
Go to: AP > 1096/1099 > 1099 reports
Select Form 1099-MISC and Form 1099-NEC